
Here be Dragons!
A Cardboard Dragon for your tabletop game
As part of the regular DnD 5e game I play in we encountered a Dragon! I play a Druid, Erik Bathmoss, and we are working through Storm King's Thunder. I wrote a bit about that here. Anyway, the GM left the game on a cliffhanger with the appearance of a blue dragon, and from the cryptic clues to the description we assumed it was an Ancient Blue Dragon, one we had been told about in a previous session.
We had a long break from 5e, and this blue dragon was always sitting in the back of my mind. It was during this break I was watching some crafting videos and came across Bard's Craft on youtube. I watched a couple of videos where he crafted dragons form cardboard and a sudden thought struck me, why didn't I make a dragon for our next session! Give or take a few more weeks of indecision as to how to start, I came across a really nice blue acrylic craft paint and thought this would be a the perfect colour for my cardboard dragon. This was my impetus to actually knuckle down and begin crafting. So I got to crafting, using a combination of the templates from Bard's Craft to get my dragon shape. I enlarged the templates on my copier in work cause this was meant to be an Ancient Dragon!

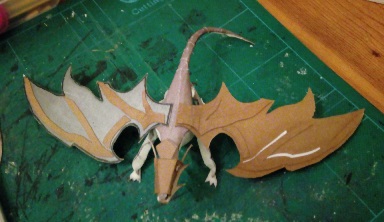
The basic dragon shape all went together relatively quickly, and I had a body out of foam and cardboard, cardboard wings and cardboard head. I decided to add the legs and the feet at this point although I did come to regret adding the feet at this ponit in time as they kept catching on my fingers and falling off later on in the build. I decided to add some basic details before adding the scales, and although I don't regret the decision, with the delicate nature of card and glue at times, I was worried about handling the dragon when adding the scales. I would have been better adding all the detail after adding the scales, but that is a lesson for next time.

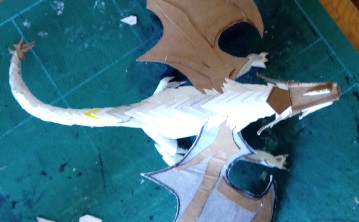
The next step was adding the dragon scales. Wow, such a long and tedious task to cut all those scales and place them individually! I had thought about giving up at various points but I persevered and I am glad I did cause it was great in the end. To build the body and add some basic detail took me about half a day, and to cut and place all those scales took the most of two full days, although some of this was drying time as I was using white glue. Once all the scales were on and had dried for a couple hours, I added final details to the dragon before allowing to dry fully overnight before painting.
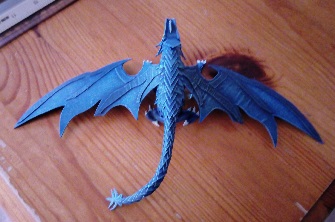
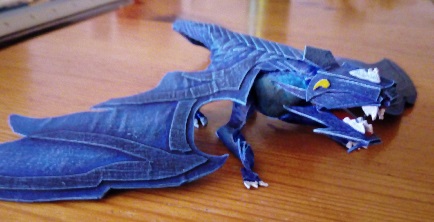
As painting was up next I looked at some photos of blue dragons (especially DnD dragons) and found them to be a blue and yellow scheme. I wasn't really fussed by this so want for dark blue / light blue scheme. It might not have been the best paint job, but I am pleased with the results. It might not come out on the photos, but I found some pearlescent white craft paint and gave the dragon a final drybrush with this.


Turning up to our next DnD session I was a bundle of excitement with the dragon in a box to maintain the surprise, and I couldn't wait to once again describe the dragon to the party, as I revealed the dragon on the table. The reveal went down well and was a welcome surprise to everyone. after the session, I left the dragon in the capable hands of our GM. You never know when he might need it again.
J